First official post! Yay! :)
I took forever with this because I'm sort of a perfectionist and couldn't decide on the perfect "first post" material. Then I finally just decided to just go with whatever I wanted so here's a fun little nail tutorial I've been planning for a while.
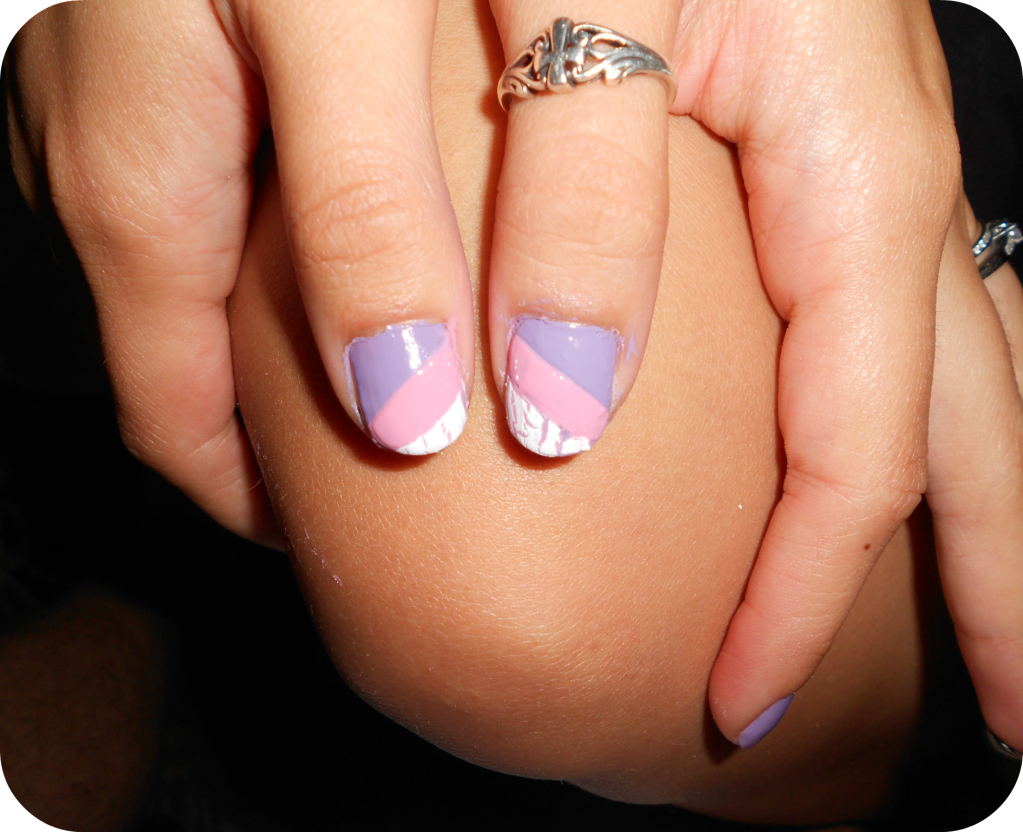
Simple Color Blocking
What you will need:

Three nail colors - I'm an Avon rep, so I used Avon's Nailwear Pro in Loving Lavender and Cotton Candy. The white was Avon's Mosaic Effects top coat in White.
Top coat - All I had was cheap drug store top coat tonight. Nothing special. :/
Scotch tape. Good ol' Scotch. :)
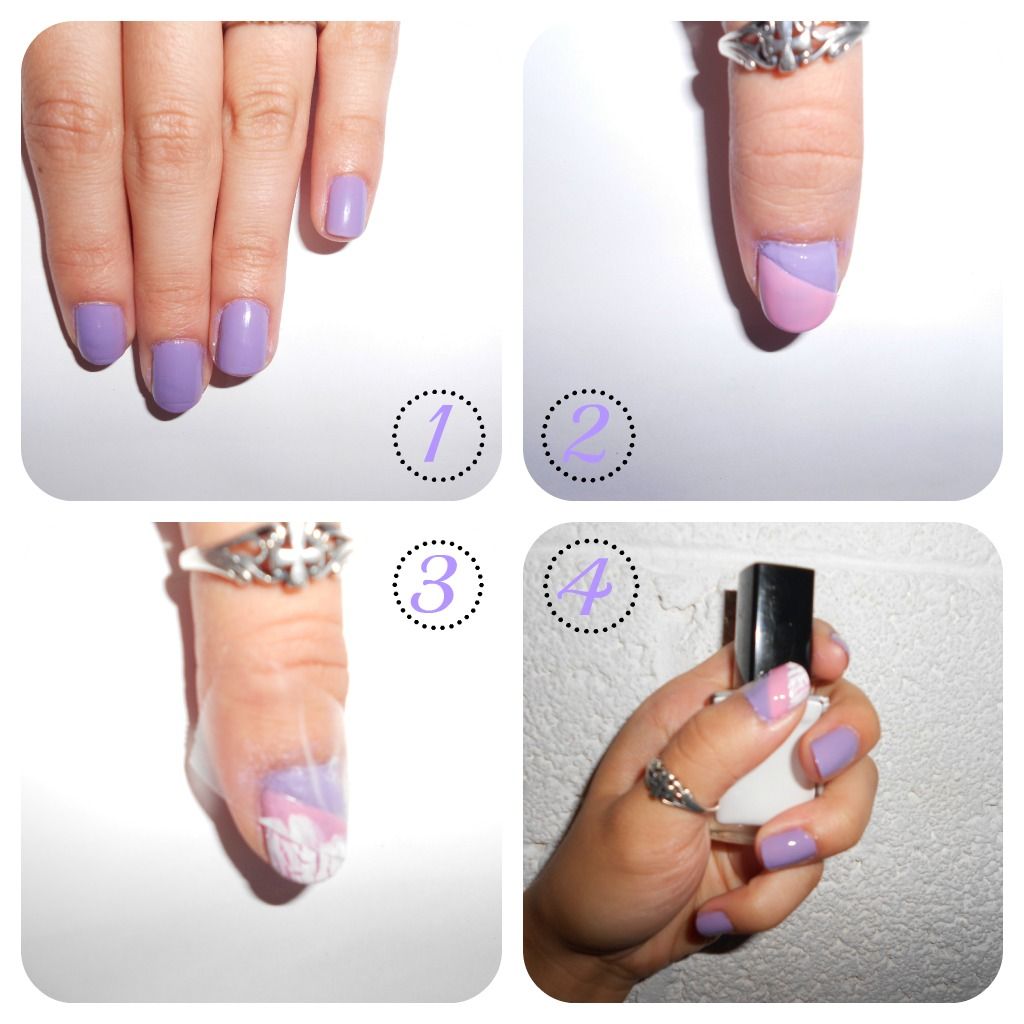
1. Paint your nails with the purple color. Let dry and add a second coat.
2. Make sure nails are completely dry and then cover bottom corner of nail diagonally with scotch tape. Press firmly.
2.5. Apply pink color to untaped part of nail. Remove tape and let dry... for a long time.
3. Apply tape at same diagonal over pink and purple, covering about 2/3 of the nail. Paint untaped part of nail with the white and let dry.
4. Apply top coat, let dry, and "voila!" :)
Variations:
- I just wanted a tiny bit of snazz so I only did the thumb nail, but this looks cute on every nail too.
- Or, if you have a steady hand, you can add a white tip to the other nails and just leave the thumb as the accent.
Some other things to remember:
- Make sure you wait until the nail is really dry before applying tape. If it's even a little bit tacky, the paint will come up when you take off the tape.
- To help minimize that issue, before you put the tape on your nail, stick it to the palm of your hand so it loses a little bit of the stickiness.
- Take the tape off as soon as you finish painting. Don't leave it on while you dry or... you guessed it... the paint will come off with the tape.
Hope you enjoyed it!
Happy painting :)
2 comments:
Sooo cute! You're so talented :):)
Thanks, Ellie! Glad you like it. ;)
Post a Comment